How To Organize Your Kitchen Spices

2015-06-30 15.20.32


I know: you’re probably reading this and thinking, “Why on earth would I want to?” 😀

But trust me when I say that once you figure out a system how to organize your kitchen spices, it will save you money and it will save you time.

And honestly, there are probably better systems out there than mine. My spice cabinet is kind of small, and I’m not inclined to move it (nor do I know where I’d move it to.)

But think about it. Have you ever ended up on more than one occasion with multiple obscure spices that you don’t use often?

Like cardamom.

2015-06-30 15.15.17

Or coriander.

2015-06-30 15.15.07

Or what about this one?

2015-06-30 15.15.31

I’m a big fan of Paleo cooking. One of the reasons I love Paleo meals is that they are very flavorful. In other words, they are recipes which require spices. Multiple spices.

When you have a household with two cooks who both like flavorful food and have a tendency toward impulse seasoning purchases, you end up with a cabinet that looks like this.

2015-06-30 15.14.05

And this.

2015-06-30 15.14.12


That’s the top shelf, with about 10 varieties of hot sauces.

See what I mean? Would you want to dig through this every time you needed something? I’m in spice hell! 😀

2015-06-30 15.17.09This picture is all the tall spices on the middle shelf. Seriously.

One item that has made finding them a whole lot easier is a lazy Susan. (Just who was Susan, anyway?) I’ve been using this guy for about 16 years. (These work great in your bathroom vanity too, by the way.)

2015-06-30 15.14.55

All the little ones sit nicely on the top shelf, and the bigger ones on the bottom.

2015-06-30 15.14.35

This certainly makes it a little easier to identify what’s there. But what about all these?

2015-06-30 15.17.09

Wait. I saw something out the window. What is that?!?!

2015-06-30 15.19.18


Yep. Squirrel! Sorry. The little stinker.

So the other day, after digging through that cabinet for the LAST time without any idea whether I had something or not, I snapped.

2015-06-30 15.20.32

My solution to this cesspool of spices was to take inventory. Sure, it took a few minutes to set up: I was waiting for something to come out of the oven, so I alphabetized them while I was waiting, and I jotted them down on paper.

Next, I typed them into a Word Document. The beauty of this is that you only have to do this ONCE. (Unless your hard drive crashes and you lose everything on your computer. In which case, you have bigger problems than this.)

2015-06-30 15.13.49

I sorted mine into 3 categories:  Spices, Seasoning Blends, and Hot Sauces.

The final list looks like this, and hangs just inside the door. Now do you feel my pain? 😀

2015-06-30 15.13.57

This handy dandy system has already saved me money: I was at the shop yesterday making my grocery list, and realized I’d forgotten to check and see if I had some whole cloves. Dang. It meant either a trip back home, or a guess. What would you do? Exactly: I would have guessed. And had a 50/50 chance of getting it right.

Wait! I have a list! So I went into my computer files, and Ta Da! I had ground cloves but no whole cloves.

My plan is to update this list every once in a while, after I get several scribbles on it. And if I run out of something, or it’s past the expiration date, immediately add it to your grocery list.

A little bit of time for a lot of rewards. That’s a winner in my book.

Add a little SPICE to your life, friends! 😀

Get Your Grill Ready for Summer!

This weekend makes the ‘official’ arrival of summer. The folks at Cargill Beef have supplied some timely and terrific tips to get our grills ready to go for the weekend. Mine is fired up and I’m grilling a versatile new recipe with beef from Sam’s Club. 

We’ve also got a GIVEAWAY! Courtesy of Cargill Beef and Sam’s Club! Shout out in the comments below what you’re grilling this weekend or your favorite food cooked on the grill.  You’ll automatically be eligible to win one of FIVE $25 Sam’s Club gift cards! Winners will be announced Saturday morning. NOTE: It may take a while for your comment to show up, but don’t worry. 🙂

During the summer, my husband and I grill almost every night. We love it, and a side benefit of it is we aren’t heating up the house by using the oven. (Saving money is a beautiful thing.)

With Memorial Day weekend coming, it’s time to get our grill ready for the summer and get grilling!

2015-05-21 15.01.45

1. Check the Hose: Considering your grill may have been sitting for many months without being used, take a few minutes to give it a once-over before you press ignite. Specifically, if you have a gas grill, check the hose from your propane to your burners and make sure it’s intact and clean. If there’s any buildup on the hose, be sure to clean it off before starting your grill. If the hose has any holes or any signs of being torn, it’s worth the few bucks to just replace it.

We bought our grill new just last year, so a quick look shows that all my hoses are in good shape.

2015-05-19 10.59.43

2. Give It a Quick Cleaning: If you have a gas grill, take the grates out and give everything a good scrub down. You can use a wire brush and a damp cloth to get the job done. Soap isn’t recommended. It can linger and it’s tough to wash off. Also, don’t forget to run your grilling tools through the dishwasher before that first cookout.

2015-05-19 10.57.45

I store most of my grilling supplies in a galvanized bucket with a lid near my grill. It keeps them handy, dry and clean. I like having everything contained nearby but not cluttered.

2015-05-19 11.06.33

It’s a great time to take inventory of your grilling supplies as you load them in the dishwasher. Somehow, I was just down to an oversize spatula and tongs; the rest of my grilling supplies have disappeared. I’m guessing they migrated to our RV. 😉

Jot down on your list anything you might need to pick up the next time you’re at the store. One of my pet peeves is to go to use something and not having it!

3. Clean Out Your Grease Trap: Before grilling season starts, be sure to pull out the grease trap below your grill and dump out any grease and grime from last year. For easy cleanup next year, line your grease trap with some sturdy aluminum foil.

2015-05-19 11.00.59

This is what my grease trap looked like. Ewwww, gross! This was actually dangerous! It’s hard to tell by this picture, but the large dark lump actually stood up pretty high; it could have easily caught fire when I was burning off food residue and the grill temp was really HOT.

2015-05-19 11.08.24

So, I wiped it out and ran it through the dishwasher.

2015-05-19 13.55.25

Much better!

4. Test Run Before Cooking: Before you get to cooking, turn on your grill, light it up and let it burn for a few minutes. Watch it to make sure all the burners are firing and there are no leaks.

Now you’ve done this, all systems are set to go and your grill is ready for summer!

Steak is a favorite treat of ours, so I’m grilling some terrific T-bones. If you’re needing some Beef-spiration, there are tons of recipes here. That’s where this recipe came from. 🙂

Did you know that all meat sold at Sam’s Club is fresh, never frozen? Me neither! Together, these big beautiful T-bones weighed almost 4 pounds.

2015-05-21 14.38.35

Beef Steak with Colorful Peppers

Ingredients

2 beef T-bone steaks from Sam’s Club
2 small bell peppers, quartered

Parsley Pesto:
½ cup packed fresh Italian parsley leaves
4 large cloves garlic, minced
3 tablespoons olive oil

Instructions

1. Place pesto ingredients in food processor or blender container. Cover; process until parsley is finely chopped, stopping and scraping side of bowl as needed. 2. Spread pesto generously on both sides of beef steaks and bell peppers. Place steaks and peppers on grid over medium, ash-covered coals. Grill, covered, 11 to 16 minutes (over medium heat on preheated gas grill, 15 to 19 minutes) for medium rare (145°F) to medium (160°F) doneness and until peppers are tender, turning occasionally. 3. Remove bones; carve steaks into slices. Season with salt and pepper, as desired. Serve beef with peppers.

This is my kind of recipe: easy, normal everyday ingredients and simply scrumptious!  I am a really good cook, but I am not a great cook. If I look at over-complicated recipes, I begin to hear bumblebees in my head.

One note about the parsley: there was no Italian parsley to be found this week, a hazard of living in a rural area. Don’t worry, you can use regular parsley and it’s still delicious!

I grilled one steak very rare and left it whole for my husband. He’s working late so it will be a special treat for his dinner.

2015-05-21 14.55.00


The other I sliced as the recipe called for; it was terrific and husband-approved (he sneaked home for a taste after I texted him a picture.) If cooked rare, you can re-heat with eggs for breakfast (YUM!) or put it on a salad.

Now, go forth and grill! And have a safe and happy Memorial Day weekend, folks.

Cheers!

UPDATE: Giveaway winners are: Hayley, Weesie, Lynn, Jenny and Peggy. Thanks for playing everybody, I appreciate it!

5 Tips For Cleaner Dishes

We have a holiday weekend coming up, graduations, reunions, parties, barbecues…in other words, it’s summer! Which means company, food, fun and…dishes! This post and the next are full of great tips to get you ready for the season.

2015-05-18 19.57.57

When I was a kid, our dishwasher was my mom. And, once in a while, me. But usually my mom. 😉

So I didn’t really have a dishwasher until…gosh…um…I don’t know. So it took me a long time to learn how to get cleaner dishes in my dishwasher. Based on my non-technical survey of the behavior of random guests at my house, they didn’t know either.

So I’m here to share my knowledge gleaned from experience, from reading, and from the dishwasher repairman.

1. Don’t rinse the dishes!

Yes, really. Do NOT rinse them.

(I figured you really didn’t need a picture to go with this one.)

Dishwasher soap is pH-balanced to work with dirty dishes. If you are rinsing your dishes, you are actually lessening the effectiveness of your detergent. Which means it won’t get them as clean.

Scrape the larger food particles off, and put them in there dirty. Yes, dirty.

I promise I do it all the time.

2. Load it full, and stack the dishes.

2015-05-18 19.58.37Yes, really. It’s hard to see in this picture, but there’s a clear glass bowl underneath the other bowls. And yes, that’s a dog food bowl on the top.

Confession: These are my dirty dishes right before I started the dishwasher. Hence, no closeup.

2015-05-18 19.58.25

Here’s my top rack. Cups, glasses, plastics, lids, and yes, more dog food bowls.

Another confession: I don’t run my dishwasher every day. I run it about every 2-3 day, either when it’s full or when it gets smelly, whichever comes first.

Once in a while I have a little residue, say, two spoons stick together or a couple of bowls moved during the washing process. But if I do, it’s only a little.

See how much work I’m saving you? 😀

3. Place like silverware together. 

2015-05-19 07.37.37

This is a tidbit I picked up from a colleague a few years ago that’s nothing short of brilliant. Why didn’t I think of this? Kudos to you if you’re already doing it!

Place all your forks together. (No worries, these are clean.)

2015-05-19 07.37.50

And, all your spoons.   I usually put the knives in the middle.

It saves a ton of time when you’re putting them away!

4. Run hot water.

2015-05-18 19.59.18

Turn on your faucet, let it run until the water is hot; THEN turn on your dishwasher.

This is probably one of the biggest factors in getting your dishes clean. Think about it…is the first cycle your dishes go through mostly cold water? HelLO! 😀 Try this and see if you don’t notice a difference immediately.

5. Don’t overuse a rinse aid.

Rinse aids are like cocktails and fine chocolates. A little goes a long way and is delightful, but too much is too much. And too much can seriously damage your dishwasher.

2015-05-19 07.46.15

This is what I use. I like that it’s all in one little cube, with no plastic coating. Pre-measured, so I don’t use too much. And with no plastic, it’s not only better for us but better for the environment.

If you are currently using a liquid rinse aid, do NOT use cubes with additional rinse aid in it. Using too much detergent and rinse aid helps keep our dishwasher repairmen in business.

I can neither confirm nor deny how I know this. 😉

Try some of these tips the next time you run your dishwasher, and let me know how it goes.

Happy Washing!

Preparing Your Closet for Winter

I’ve always said that life is messy, and indeed it is! Apparently I am also camera challenged, as my 2-year old Sony camera that I love so much is in for repair. So for the near future, I am having to take all my pictures with my phone, which means they aren’t as clear and crisp as I’d like them to be.
2014-09-08 17.45.07I love fall. Without a doubt, it’s my favorite season, and a welcome sight after a long, hot summer.

Fall is a time for cozy-ing up, cooking, enjoying the last nice days of the season, the fall color…aaah!

It also means it’s time to get your closet ready for the coming winter months. It’s sort of a way to take inventory of what you have, what you need, and maybe even fall in love again with some old favorites. 🙂

I know you’re busy, peeps. Don’t stress yourself or get overwhelmed by dragging out everything at once. There’s not really any right or wrong way, and the closet police are not going to come after you if you make a mistake.

Just do it a little at a time – you can get a lot done in 15 minutes! To make it easy for you, I’ll break it down into steps; all you have to do is move through the steps one at a time. Like magic, it will be done!

So, grab a cup of coffee or a glass of wine, and let’s take an honest assessment of your closet.

1. Pull out the summer things you love but you know you won’t wear again until next spring. 

2014-09-08 17.45.22

Remove them from hangers and set them aside so they won’t be in your way, especially if you’re working on this project over several days.

This may include sleeveless or short sleeve tops that you wear alone and not under a blazer as a shell. Make sure they don’t need mending or have stains. You want to store only clean, ready to wear items.

I know you read a lot that “if you haven’t worn it in a year (or two years), then get rid of it.” I disagree. If you love it and feel fabulous in it, keep it. You’ll eventually wear it.

Take these Minnetonka shoes, for instance. I bought them 4 or 5 years ago in Ft. Myers Beach, FL. In those last several years, I think I wore them once or twice.

2014-10-13 07.10.02

Suddenly, this summer they became my ‘go-to’ shoes. I rest my case. 😀

2. Pull out everything you know you won’t wear again. 

2014-09-08 17.45.37

If it is too small, doesn’t fit right, you hate it but hate to admit you wasted the money, has bad memories associated with it, or is older than your oldest child (especially if they are in junior high) it needs to go. Pronto!

If you need to try it on, this is the time to do it. Liberate yourself from clothes that drag you down!

And if you ask a friend or family member’s advice, remember, you can only look as fabulous as they are honest. So don’t be mad at them for telling you the truth. Perhaps they did you a big favor.

Bag them up, and keep the bag nearby until you’ve sorted through your winter clothes.

3. Make a neatly folded pile for items that need mended, items that need dry-cleaned, and items that need washed (or throw them into the hamper.)

If you don’t like to sew or don’t have the time, make a plan to drop them off for mending in the next couple of weeks. My mending stays in a chair in my den, which is near my purse. That way I can remember it.

4. Are you planning for a vacation this winter? Now’s the time to pack for it!

2014-09-08 17.47.26

As I was sorting through everything, I placed the items I knew I would wear in Florida this winter in a tote to carry out to our RV. It’s much more enjoyable to pack that sucker when it’s 65 degrees than -3. I’m just saying…

Be thoughtful, take your favorites, and since you wore them so recently, you’ll remember which those are. Pack them now, and label your tote so you will remember where you packed them!

5. Assess what’s left in your closet.

2014-09-08 17.46.43

You may have a few multi-season items, dress clothes, etc. Try them on, make sure they fit, make sure you love them.

Sort your shoes, get rid of any that you don’t like or don’t fit or look tired. Move your summery sandals to a less accessible spot.

Do you need to rearrange the order?

I actually switched out my closet a few weeks ago, I just haven’t sorted my shoes yet.

In the spring, I talked about how I hang everything in my closet by color. My friend Samantha takes it a step further and hangs hers according to sleeve length. What a great idea! I have done that several times, I just forget to keep doing it when I hang my laundry up. 😀

I tell you this because I want to stress that the most important thing is to create a simple system that relieves your mental stress but works for you.

And, for the love of all that is holy, if you are using wire hangers, STOP IT. This is how all your knit clothes end up with ‘hanger nipples’. Invest in some decent hangers which support your clothes, even if you have to buy just a few at a time. You don’t have to spend a fortune on them, even the plastic tube hangers are a better choice and are inexpensive. For your dress clothes, the dress and suit hangers are great to help preserve their shape.

6. Bring out your winter-season clothes.

2014-09-11 06.59.56

The fun of this is that it’s almost like Christmas. 😀 I enjoy seeing my old favorites again. But then I’m easily entertained.

As you sort and hang or fold your winter things, make an honest assessment: is there anything you know you won’t wear? That now, given the absence of a few months, just doesn’t seem right? Now’s the time: get rid of it too.

Put them in the bag with your summer clothes, then place the bag in your car NOW to drop off the next time you’re running errands.

Do you have some things that you aren’t sure you want to wear, but yet aren’t sure you want to get rid of yet? Leave them in the tote that you fill with your spring clothes. The next time you swap, evaluate them. Maybe that will make parting with them easier.

2014-09-11 07.38.41

7. Sort your accessories.

Over the coming days/weeks, sort through your accessories. Coats. Purses. Socks. Jewelry.

If it makes you feel good or you think you’ll wear it, keep it. Otherwise, bless someone else with it.

The exception to this rule is sentimental items. I have several things I have saved that have belonged to relatives and friends who have passed away. I have kept these items, but I have them stored in a separate place that isn’t in my closet.

I keep a box in the basement where I place things I’m going to donate. When the box is full, I drop it off.

Your closet should contain only the clothes you love that you’re wearing for the current season. If it’s stuffed to the gills and you can’t find anything, odds are you’re keeping items in there that shouldn’t be there. Keep things you don’t use regularly or that don’t belong there somewhere else.

8. Make a list of things you need.

2014-09-08 17.46.08

Is there a few items you need to make your wardrobe ‘complete’?

Do you need new socks? Dress pants? Turtlenecks or tees? (Those look ‘tired’ easily, so they need to be replaced more often.)

The shelf above is where I keep my tee shirts folded. Sure, I would love to have one of those closet organizing systems, but for a variety of reasons, it’s just not practical here. Not to mention I find the thought of selecting and installing it exhausting. Who has the time?

These little shelves work perfectly. You can see I’ve labeled them to simplify finding them. And if I decide not to use them here, I can multi-purpose them somewhere else in my house.

How about pajamas? Are you wearing old pajamas or lounging clothes which are stained or have holes?

Truly, the little luxuries in life have to be new socks and new pajamas. 🙂

We’re moving into the time of year when we spend more time in those things. Choose something comfortable and cozy that you’ll love to wear: you’ll feel so much better! I know you may have some favorites, but if your favorites have holes and are stained, you aren’t doing yourself, or anyone you live with any favors.

If you shop with a list, you’ll be more focused, and are likely to be happier with your purchases. You’ll also SAVE MONEY! And who wouldn’t love to do that?

This year, what I needed most was cardigans which could dress up or down. Even though I wear jeans at the shop, I like to look nice in case I have an appointment or a meeting with a client. I needed something that I could wear with Uggs or dress pants.  Recently, I’ve picked up 3, and one of them is in the new trendy color of plum for fall. Super cute! And versatile! These cardigans are timeless, so I can wear them for a long time.

2014-10-13 10.07.16

So make your list, check it twice, and carry it with you in a safe place in your purse. Anytime you shop without a list, whether it’s groceries or clothes, you risk overspending or forgetting something.

Taking the time to organize your wardrobe and accessories will truly help you have less stress in your life. It makes you feel so good to open your closet door and see only the things you love inside. You work hard, you deserve to feel good!

Happy sorting, friends. And happy fall! 🙂

The Best Planner EVER!

My dear readers, I’ve missed you so! Blogging regularly makes me feel so…well…regular. 😀 But alas, I have to make money too. So I promise I will return with another post following this one as soon as I can. I have so much to tell you!

2014-07-27 16.42.02

I’m a planner person.

Regular readers of my blog as well as my close friends also know that I’m a list-maker.

So it was almost destiny when, thanks to my friend Erika, I discovered this planner on her Facebook page.

I was intrigued.

But then she went a step further and posted the VIDEO. Wow.

Never one to make an impulse buy (my friend Peggy says anything you’ve thought about more than 10 seconds cannot technically be considered an impulse buy), I pondered it for several days.

Then I went to work out one morning, and right there, right in front of my very own eyes, was my friend Samantha’s planner. It was the same planner with a different cover.

Suddenly, the cannons fired and fireworks lit the sky…inside of my head. That sealed the deal! It was a sign.

The planner needed to be mine.

The cover is removable, and you can switch it out with a different style if you want. Cool, eh?

2014-07-27 16.57.11

It’s the perfect size to slip into your (large) purse or tote. But it’s so pretty, why would you want to?

It comes with motivational quotes everywhere, and lots of color.

2014-07-27 16.44.50


A calendar for the year…


2014-07-27 16.45.25


The month…

2014-07-27 16.46.11


And the week. 🙂 Each day is broken down into morning, day, and night…

2014-07-27 16.47.04


There’s room at the bottom for meal plans, or other things you like to keep track of. I’m using it for meal plans, it just so happens that I haven’t been able to plan one since I got the planner. (Now that is a conundrum!)


2014-07-27 16.47.21


Over to the left is a list of weekly goals or other notes…

2014-07-27 16.47.54


And look! It comes with STICKERS! Great to have some fun and make occasions more special. 🙂

2014-07-27 16.48.07There are various colors and occasions…

2014-07-27 16.49.48


And blank ones too to add your own!

2014-07-27 16.50.24


Notepaper for lists! Love, love LOVE this! Now I don’t have to carry the extra list notebook along with my planner. 🙂


2014-07-27 16.49.10


And multiple pages of blank unlined paper with various designs and colors.


2014-07-27 16.49.34


A pocket page which includes a perpetual calendar. You only have to write down birthdays and important phone numbers ONCE! You simply transfer it to your next planner. Is that a time saver, or what?!

I can’t count the number of times people have said to me BF (before Facebook), “I don’t know how you remember my birthday!” I WRITE IT DOWN. Like everything else! 😀


2014-07-27 16.51.08 There’s a clear pocket for stamps, business cards, or whatever in the back.

2014-07-27 16.54.01


And they send you several stickers with your name and motivational quotes. 🙂 FUN STUFF!

2014-07-27 16.53.21


There’s also some adhesive gift tags, but I didn’t get a picture of those.

2014-07-27 16.53.36


My friend Sophia, also a planner, fell in love with it, so I ordered her one for her Christmas and birthday. Her birthday is actually a week before Christmas, but we unanimously decided to start celebrating it June 30 to change things up a bit.

Her gift was either really early or slightly late, depending upon which way you want to look at it.

2014-07-29 11.24.29


You can see her page divider is in the front of hers. Each one always comes beautifully wrapped, like they really thought about you while they were doing it.

So I ordered a couple of other cool things: bands to put around my planner to keep it closed, and personalized matching notepads. The notepads come with adhesive to stick inside the back cover of your planner all ready for you to leave someone special a note.

2014-07-29 11.40.21


How often do you receive an invitation to an event, and by the time it gets here, you’ve forgotten where and what time it was?

These clips allow you to clip the invitation in your planner during the week in which it happens. Is that cool, or what? No more wasted time looking for that stuff.

2014-07-29 11.40.53


Time is a valuable commodity which I hate to waste on unproductive, useless things such as searching for something I’ve misplaced.


2014-07-27 16.45.37


If you’re drooling over this planner as I was, you can check them out and order them here.

In the element of full disclosure, I will get a few freebies if they know I sent you. Like stickers, etc. Nothing big, I promise!

I have to warn you, these cost  more than the planners you can buy at Wal-Mart. But the enjoyment I receive from it far outweighs that. It simply brings me joy to look at it every day.

Or if you don’t want to click the link, you can go here:

2014-07-27 16.42.50

Just be sure to watch the videos so you can see all about them. There are all kinds of colors and patterns.

ENJOY! 🙂

5 New Uses for Everyday Items

It’s no secret: I have a passion for re-purposing. There’s nothing so satisfying to me as giving something a new lease on life. Especially if it’s junk. (Junque?)

Almost as much as junk, I have a passion for re-purposing everyday things. The more uses you can give an item, the less it costs you, eh?

Or something like that.

Here are some new uses for everyday items that I use all the time.

While not everything in this post may work for you or your style, let this post get your creative juices flowing. What do you have simply lying around your house that you can find a new use for?

Here’s my favorites:

1. Saddle Blankets

2014-07-06 10.11.15
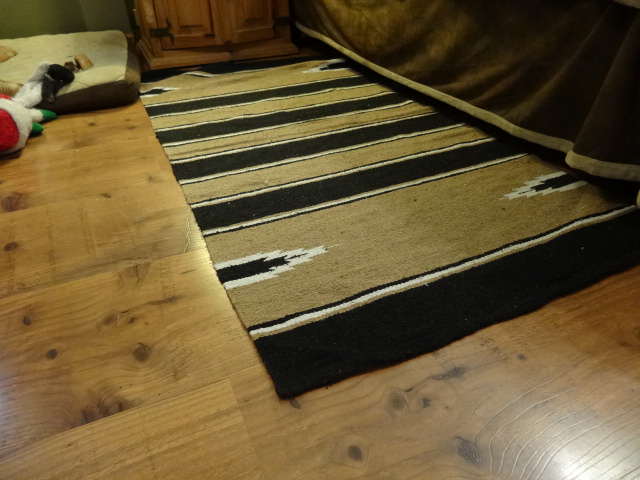
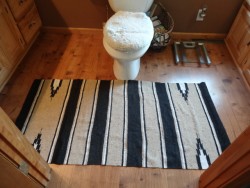
This is a rug in my bedroom. It began it’s life as a saddle blanket (yes, for horses) at Tractor Supply. (Farm & Home has them, as I assume most farm supply stores who have supplies for horses would.)

If you have animals, you know that animals involve messes. Even the best house-broken pet is going to have an accident from one end or the other at some point. And I know from experience: even if you don’t have carpet, they choose the most expensive rug in the house. (Or is it just my dogs that have a taste for the finer things?) 😉

These are a great size for rugs. And guess what? They are only about $10!! And they wear like iron!

After sacrificing a few for the art of learning, I figured out the best way to launder them. DO NOT PUT THEM IN THE DRYER!

I wash them in cold or warm water on the gentle setting, adding about a 1/2 cup of kosher salt in addition to detergent, which will help keep the colors from bleeding. Then hang them to dry. Voila!

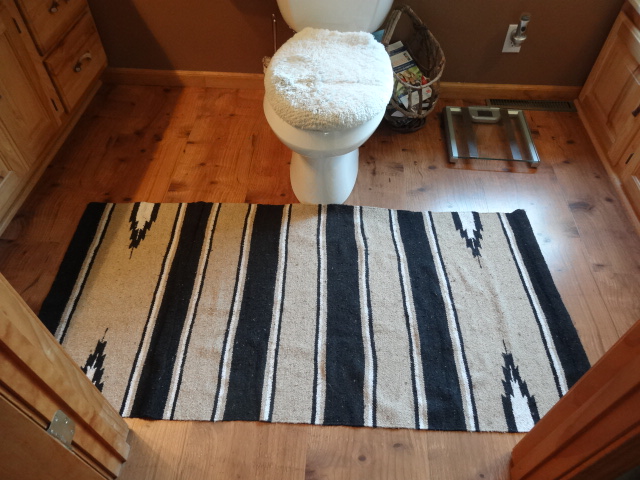
They are big enough to cover almost my whole bathroom floor.

2014-07-06 10.12.17


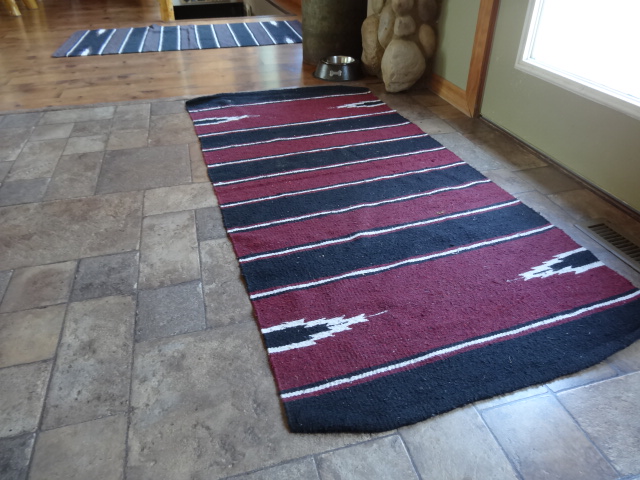
At my back door and at the top of the basement stairs.

2014-07-06 10.37.48


And I even use them as decorative items. (Although these actually came from Mexico.)

2014-07-06 10.42.00


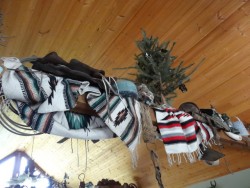
I’ve used them in the past as floor mats, and they are currently used as cargo mats in the back of my car. I picked up gray, white and black ones for the car, and they look great! I even use them in our RV. You could use them as tablecloths for a picnic table, for wall hangings in your family room/man cave, or tons of other things.

2014-07-06 10.31.30

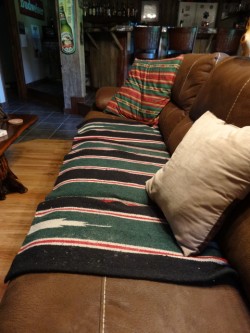
They are also great furniture covers if you have pets, or simply want to add some color and hide a stain on your sofa. 😉  Check ’em out!
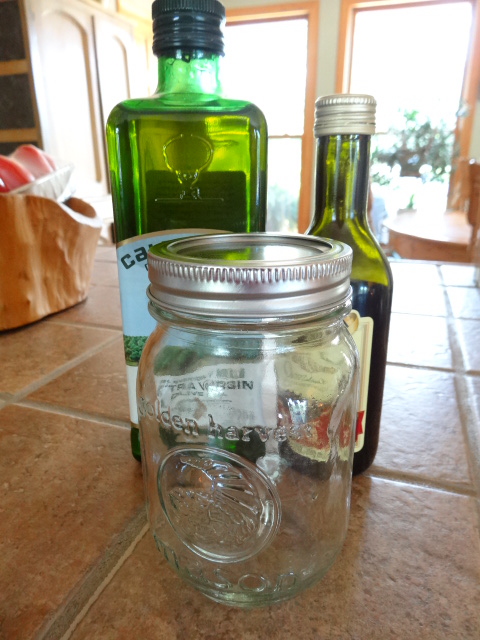
2. Glass Jars

How many times do you a product – such as marinara sauce – that comes in a quart jar? Do you end up tossing the quart jar without thinking, or do you re-purpose it?

We often end up with these jars, which come with their own nice screw-off lids.
2014-07-06 10.27.37


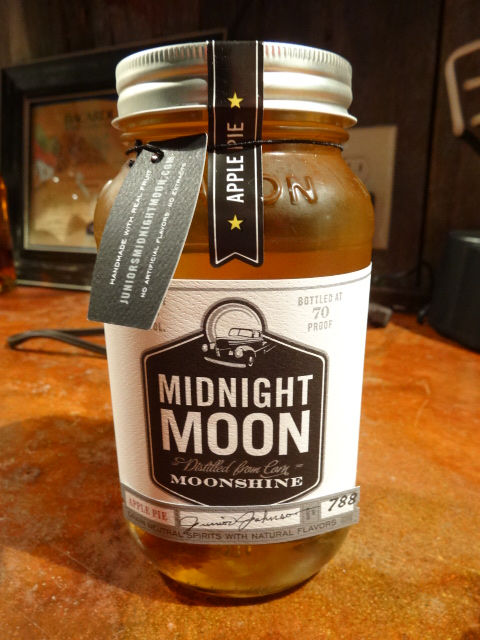
By the way, I don’t recommend serving this apple pie at your next large family gathering. Or maybe you should… hmmmm….that could make things interesting!

Sorry. Squirrel.

I.love.these.jars.

2014-07-06 10.15.54


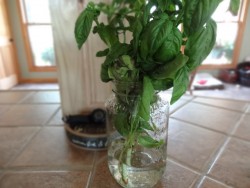
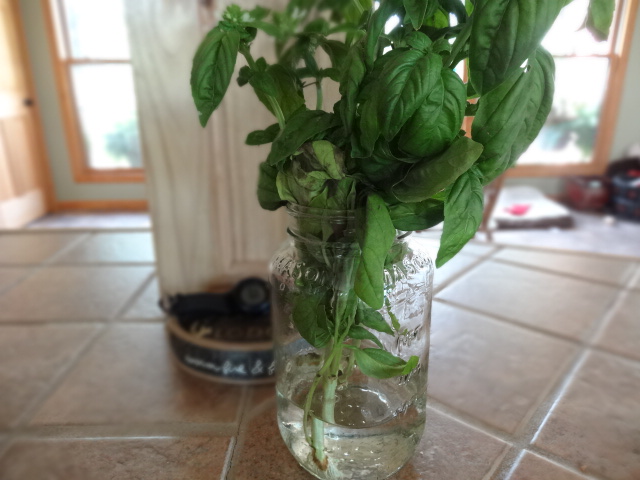
Currently, one is host to some basil that I should really make the decision to toss. But I can’t. So I’ll wait until it makes the decision for me. How cute would it be with flowers?

2014-07-06 10.18.06
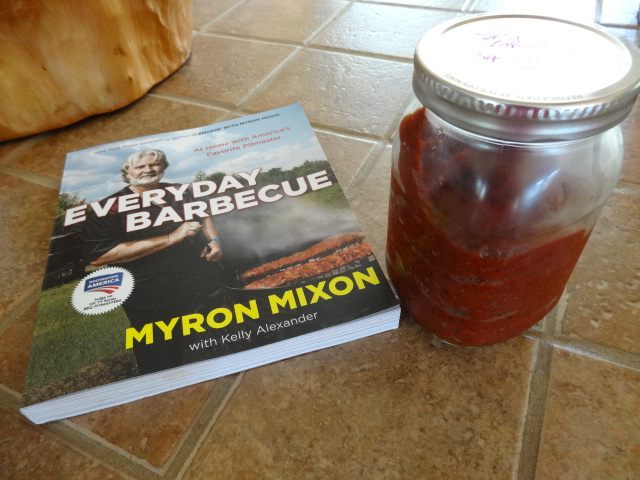
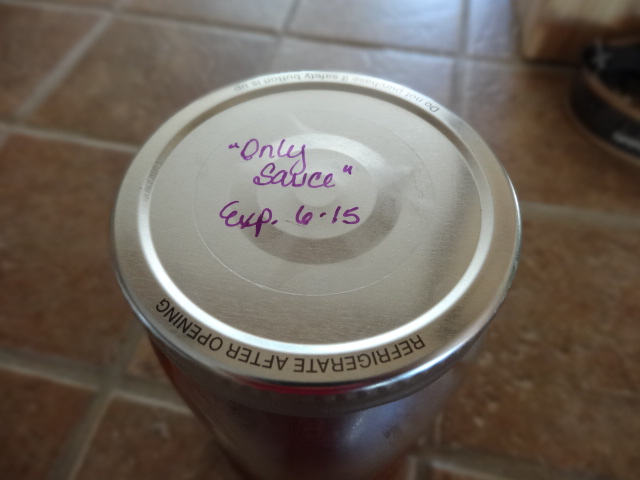
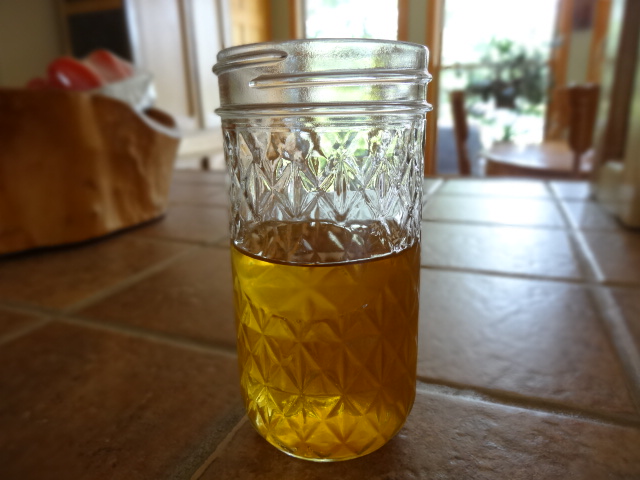
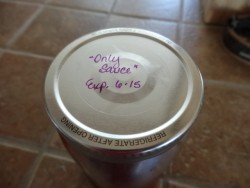
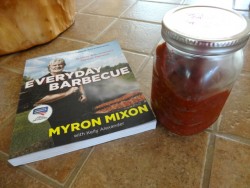
One is holding a homemade BBQ sauce from the @Lord_of_Q himself, Myron Mixon. It keeps for a year, which makes a jar the perfect vessel to hold it. You can purchase clear round Avery labels and print pretty little labels for whatever your container holds. I was lazy and just hand wrote mine.

2014-07-06 10.17.35


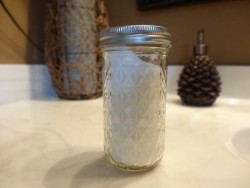
One is holding kosher salt for the laundry.

2014-07-06 10.26.35


The smaller ones make great containers for salad dressing, either home made, or store-bought and decanted.

2014-07-06 10.40.29


The jar in the above picture now actually holds a Myron Mixon rub that I made yesterday which also keeps for a year.

The decorative ones make wonderful juice glasses. That’s apple juice, by the way. Not a specimen. (Just in case you were wondering.)

2014-07-06 10.46.27


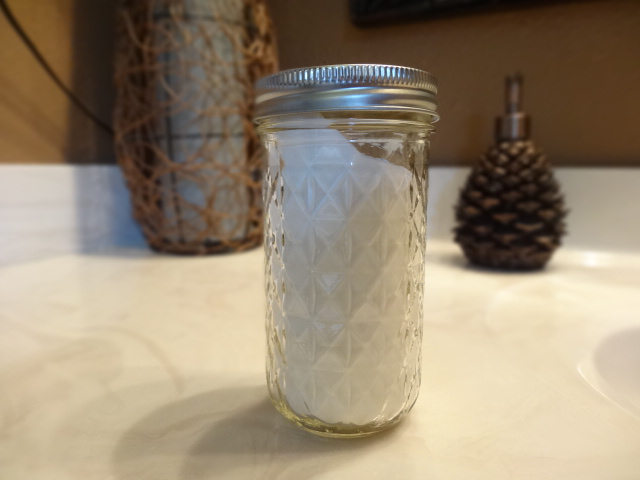
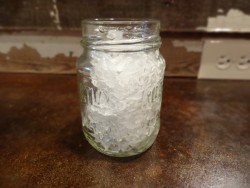
They are also great to hold beauty supplies in the bathroom. This is baking soda; I use it to whiten my teeth and as a facial scrub. 🙂

2014-07-06 10.13.14


This one is my current favorite cocktail beverage glass. I carry it everywhere. Seriously. I think maybe pizza sauce came in it. I can’t even remember. But it was free!


2014-07-06 10.48.25


You name it, they work great for it. They are great canisters for just about anything!  And best of all..some of them are free!
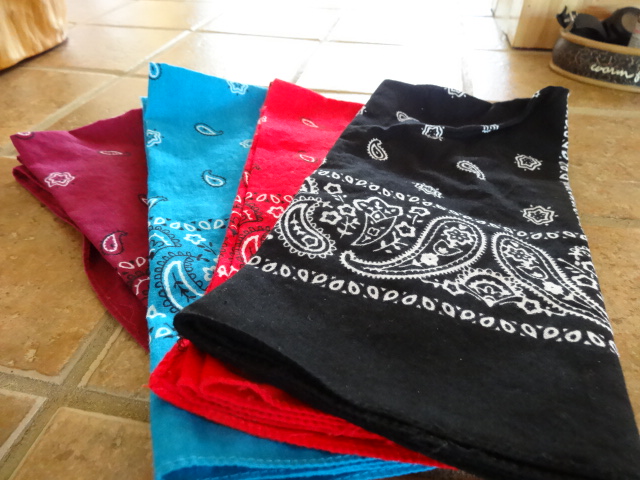
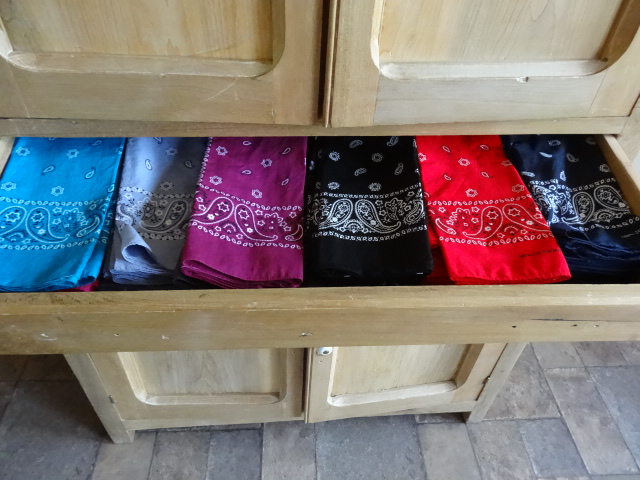
3. Bandannas

Okay, I can’t totally take credit for this one, although I’d love to.

I’m an avid fan of the Pioneer Woman, which is from whom I got this idea.

We are very casual entertainers. Thus, paper napkins seem too…casual if you’re having several people over. Cloth napkins seem too dressy.  Bandannas are perfect!

You can throw them right in the laundry, and don’t have to worry about starching them!

2014-07-06 10.50.52


They come in a variety of colors, and they cost $1.00 each at Wal-Mart. (Which happens to be the only store that carries them here in our town. Where you are may be different.)

You can match your dishes, or just mix and match colors.

2014-07-06 10.51.05


Over the last couple of years, I’ve collected a few colors to mix it up.

You can dress up your dog for company. 🙂

2014-07-06 10.54.03

“Mother, would you please put away that stupid camera? You’re embarrassing me.”

Oh, and just in case you’re wondering, I did wash this bandanna after she wore it. Just in case you happen to ever eat dinner at my house. 😉

Wrap them around jars and use them to hold utensils at a picnic, or use them to hold pens and pencils on your desk. My mother kept her collection of buttons in a jar.

You can use them in your hair, or as a fashion accessory.

I didn’t take any pictures of that because I shot these pictures Sunday morning, and I was lazy and didn’t put on any makeup. So nothing to see here folks; let’s move along. 😉

I could go on and on about the versatility of these things!

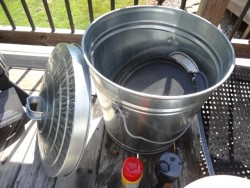
4. Galvanized Buckets and Pails

I literally have these everywhere.

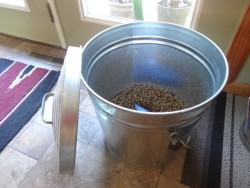
I have one in my kitchen to hold dog food. It’s mouse-proof, and matches everything!

If you don’t like the color, paint it! Stencil it! Decal it!

It holds an entire 30-pound bag of dog food, so I always know how much food I have left. It has a large handle which will hold the lid on if we’re traveling and makes it easy to carry.

This one cost me $18 at Tractor Supply.

2014-07-06 10.38.26

If I tire of using it for dog food, I can use it for fish food, bird seed, or anything else that needs contained.

NOTE: IT IS NOT WATERPROOF!

There are two small holes on either side of the lid handle which will  allow some water to enter if it rains. So I don’t recommend keeping food in it outside.

But it’s perfect for containing grill accessories!

2014-07-06 10.39.12


I use a tub to hold blankets in the basement. If we’re having a party, I’ve been known to move this outside and fill it with ice and beer/water/soda.

2014-07-06 10.56.21


You could even bob for apples in it at Halloween! Or go pick them when the time comes.

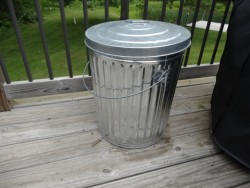
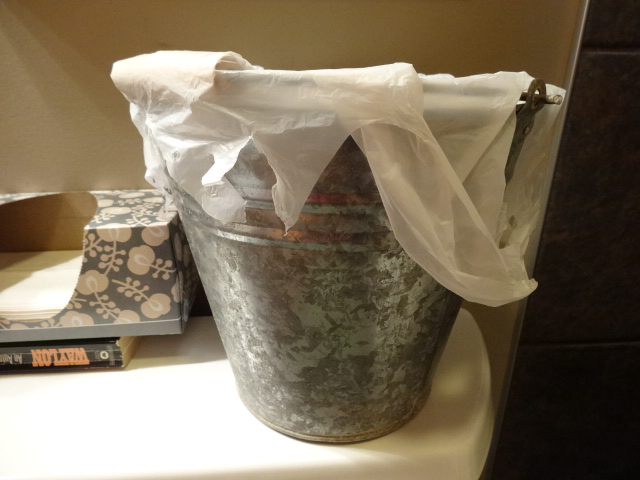
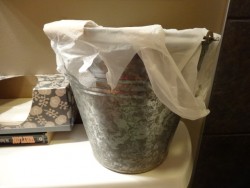
The picture below is the wastebasket in Jimmy’s bathroom. I have a larger one in the bathroom at the shop.

Inside each of them is another of my favorite multi-purpose items: a Wal-Mart bag. Seriously, there’s a million things you can do with these! Besides small trash can liners, we use them for poopie bags when we travel.

Sorry. Squirrel.

2014-07-06 10.57.56

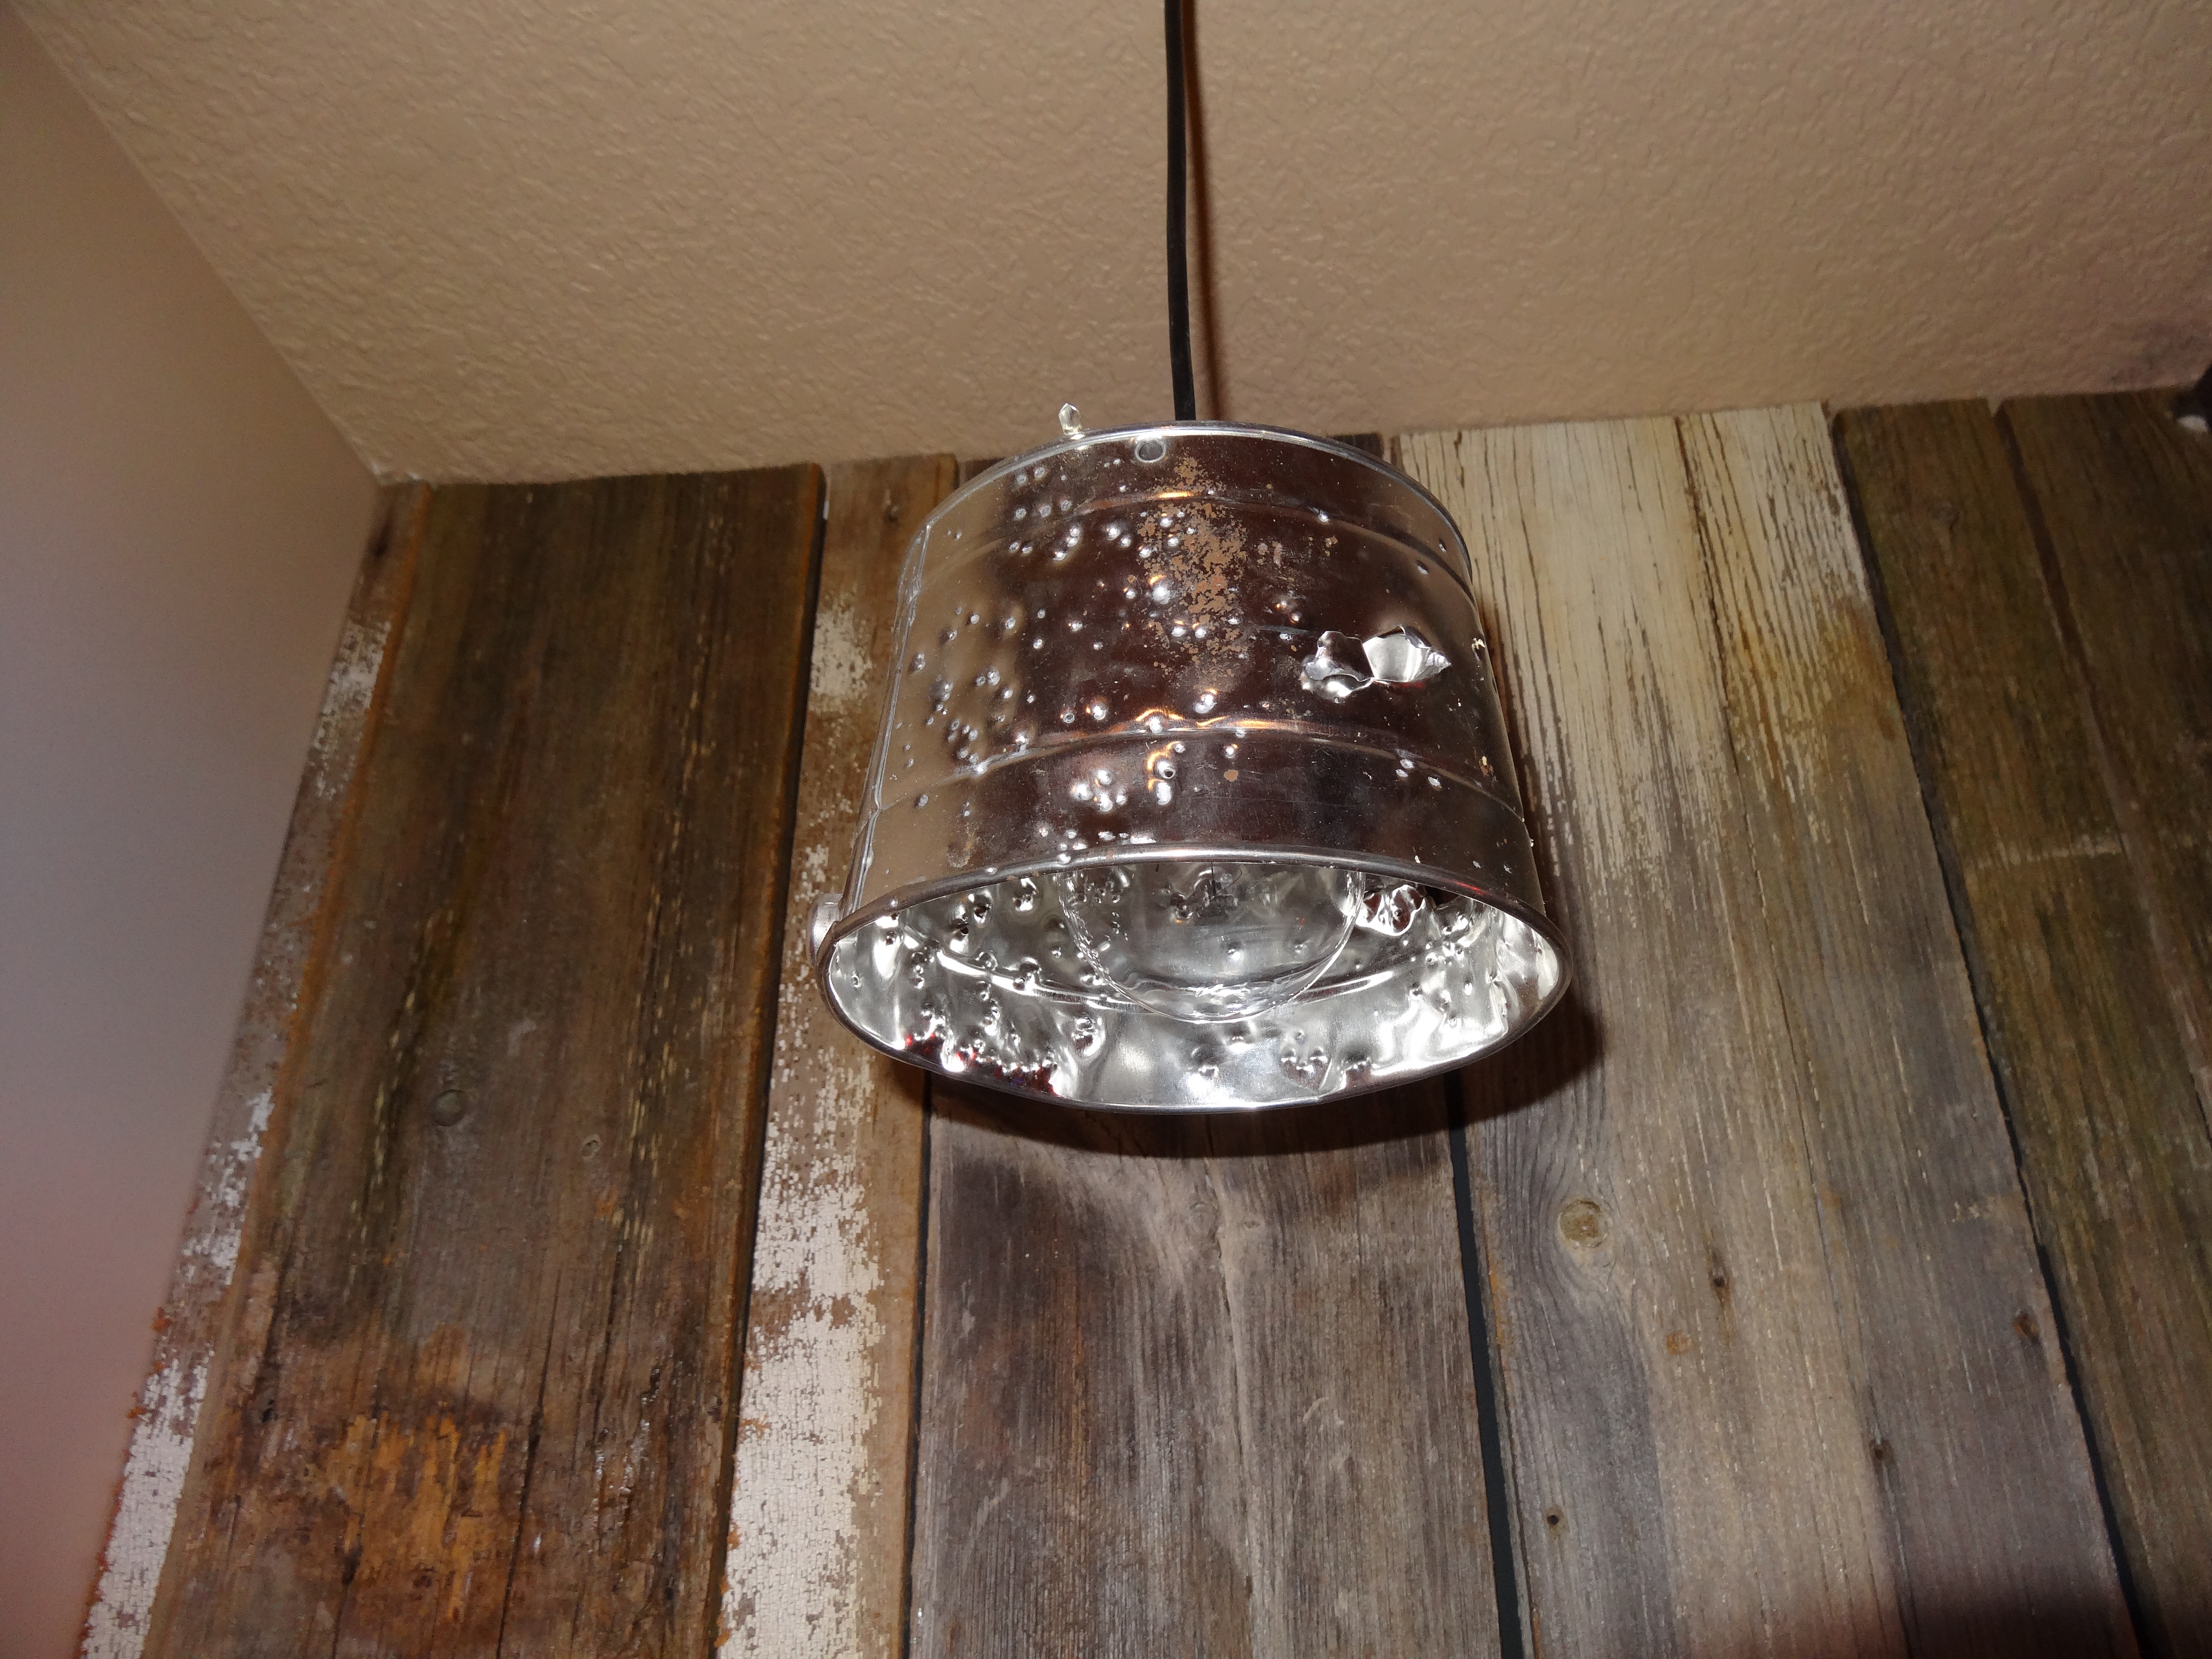
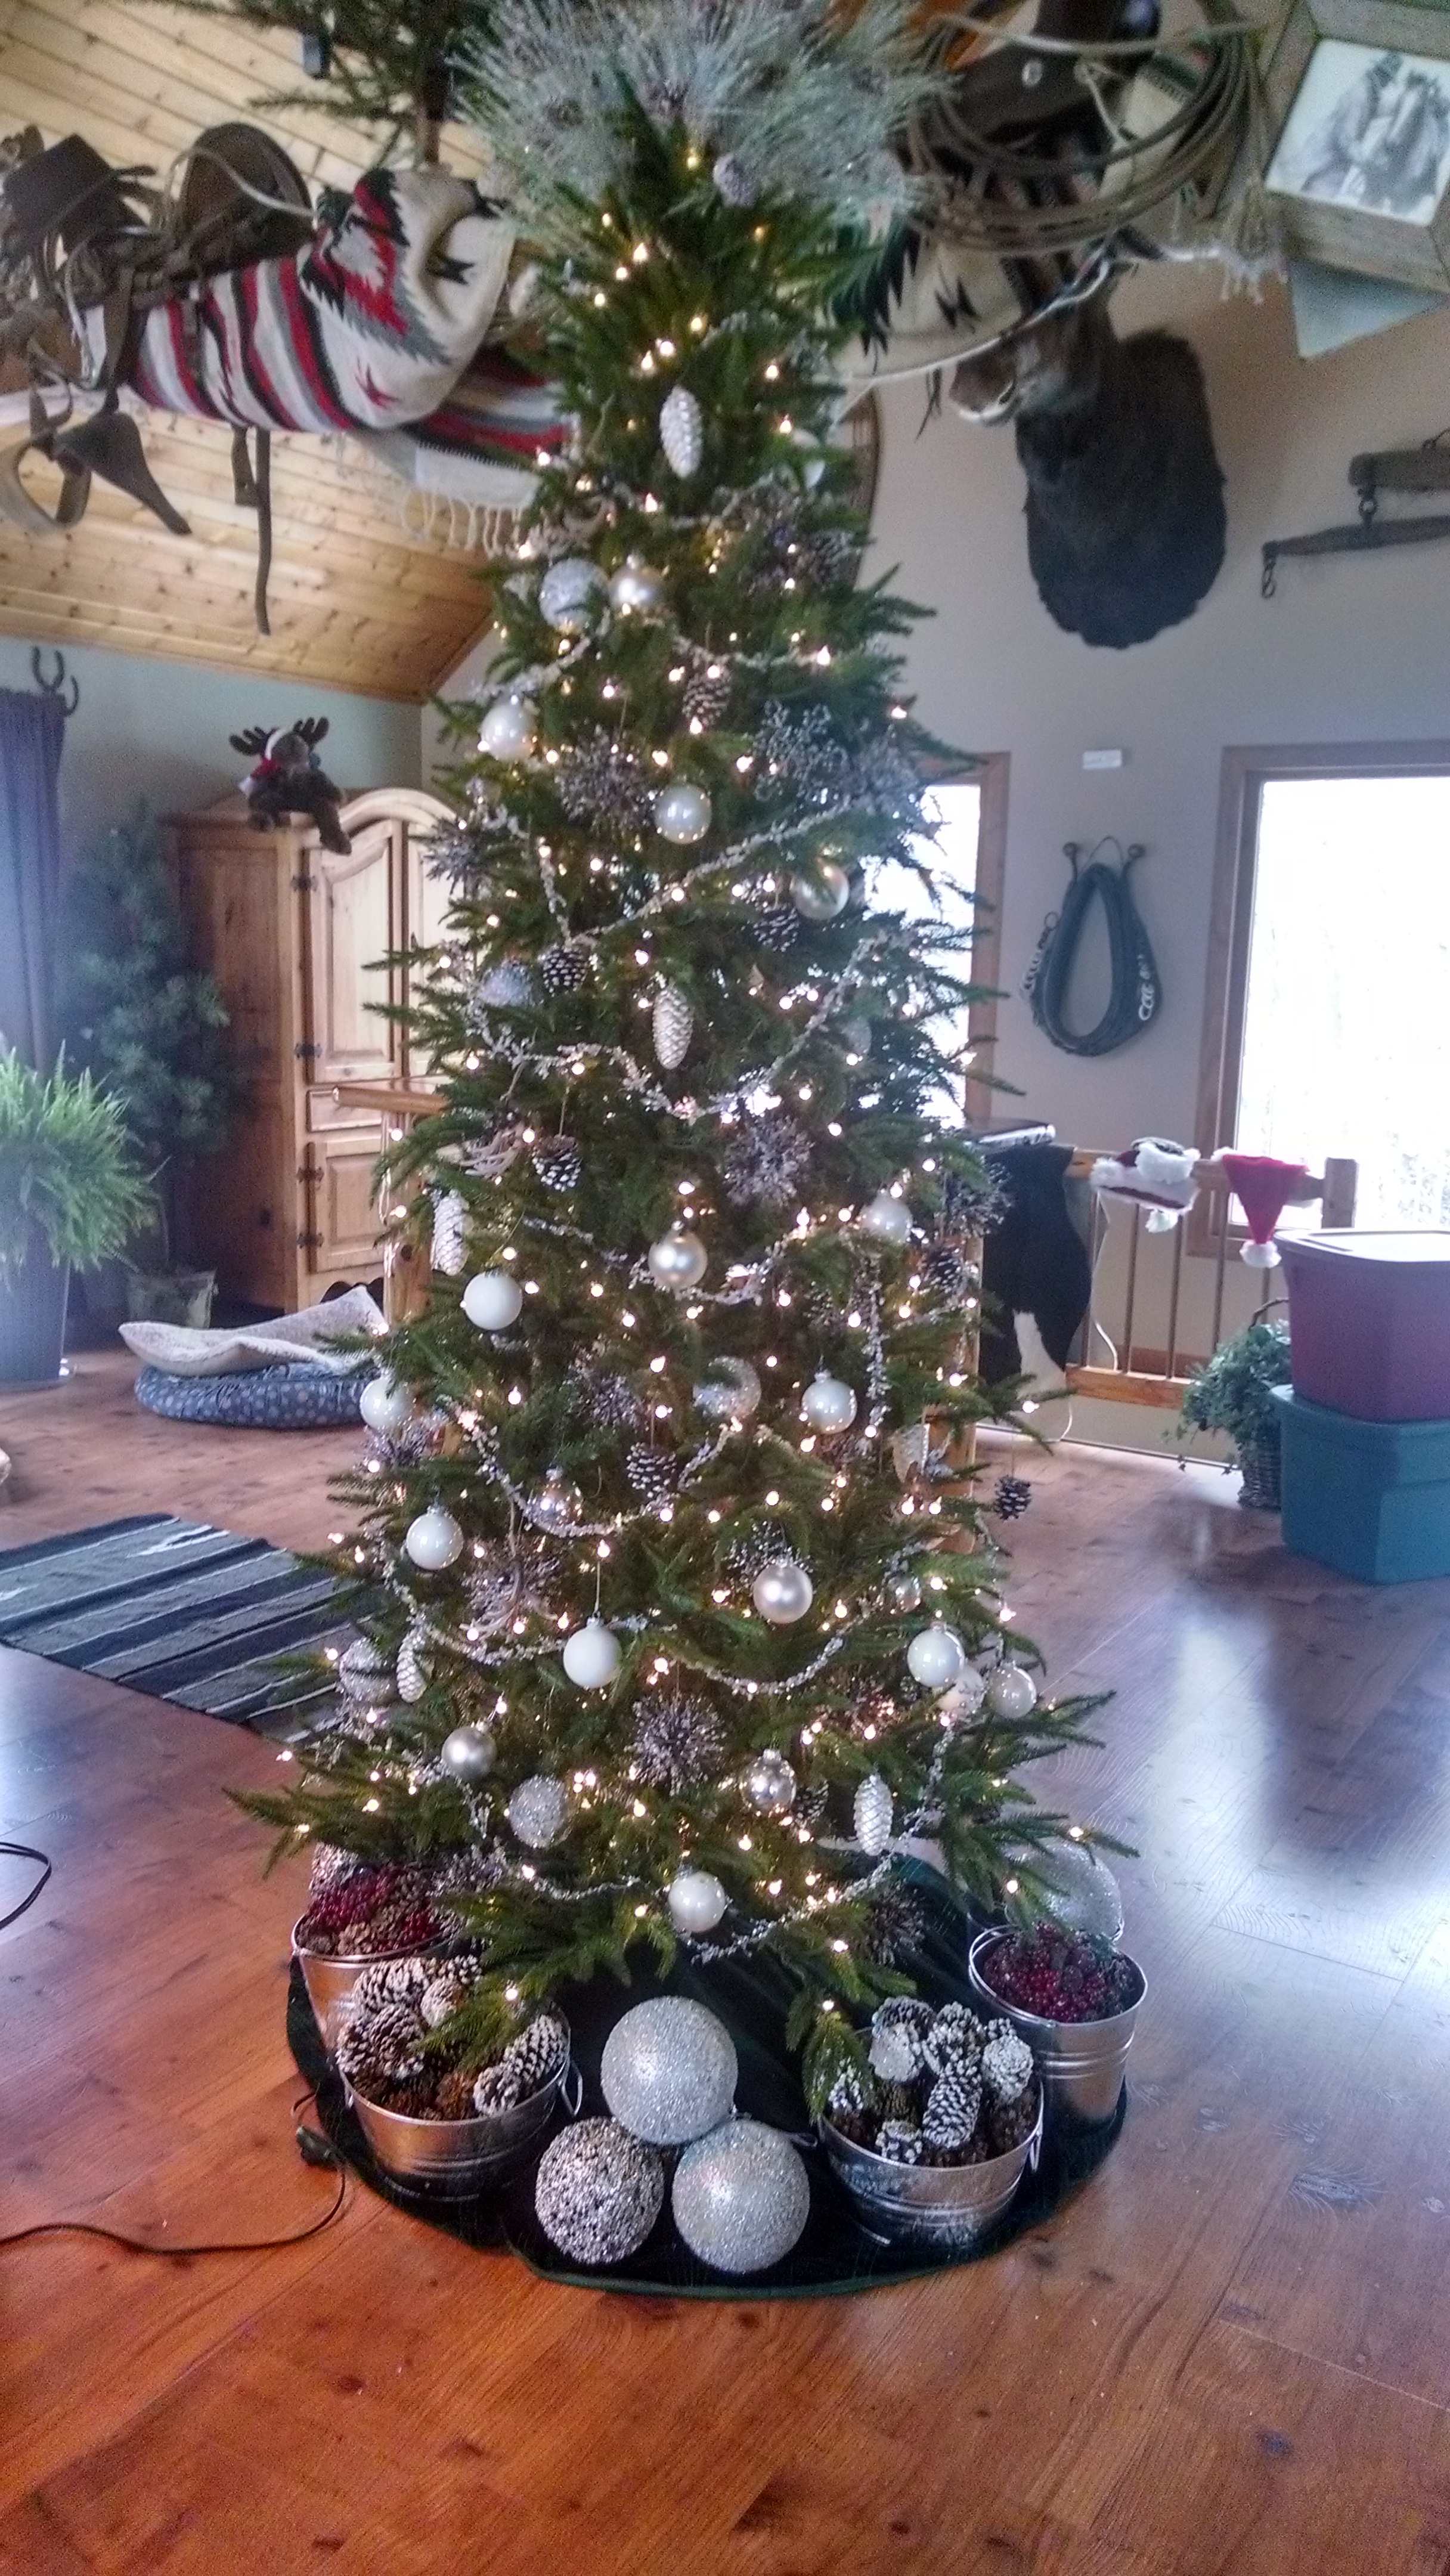
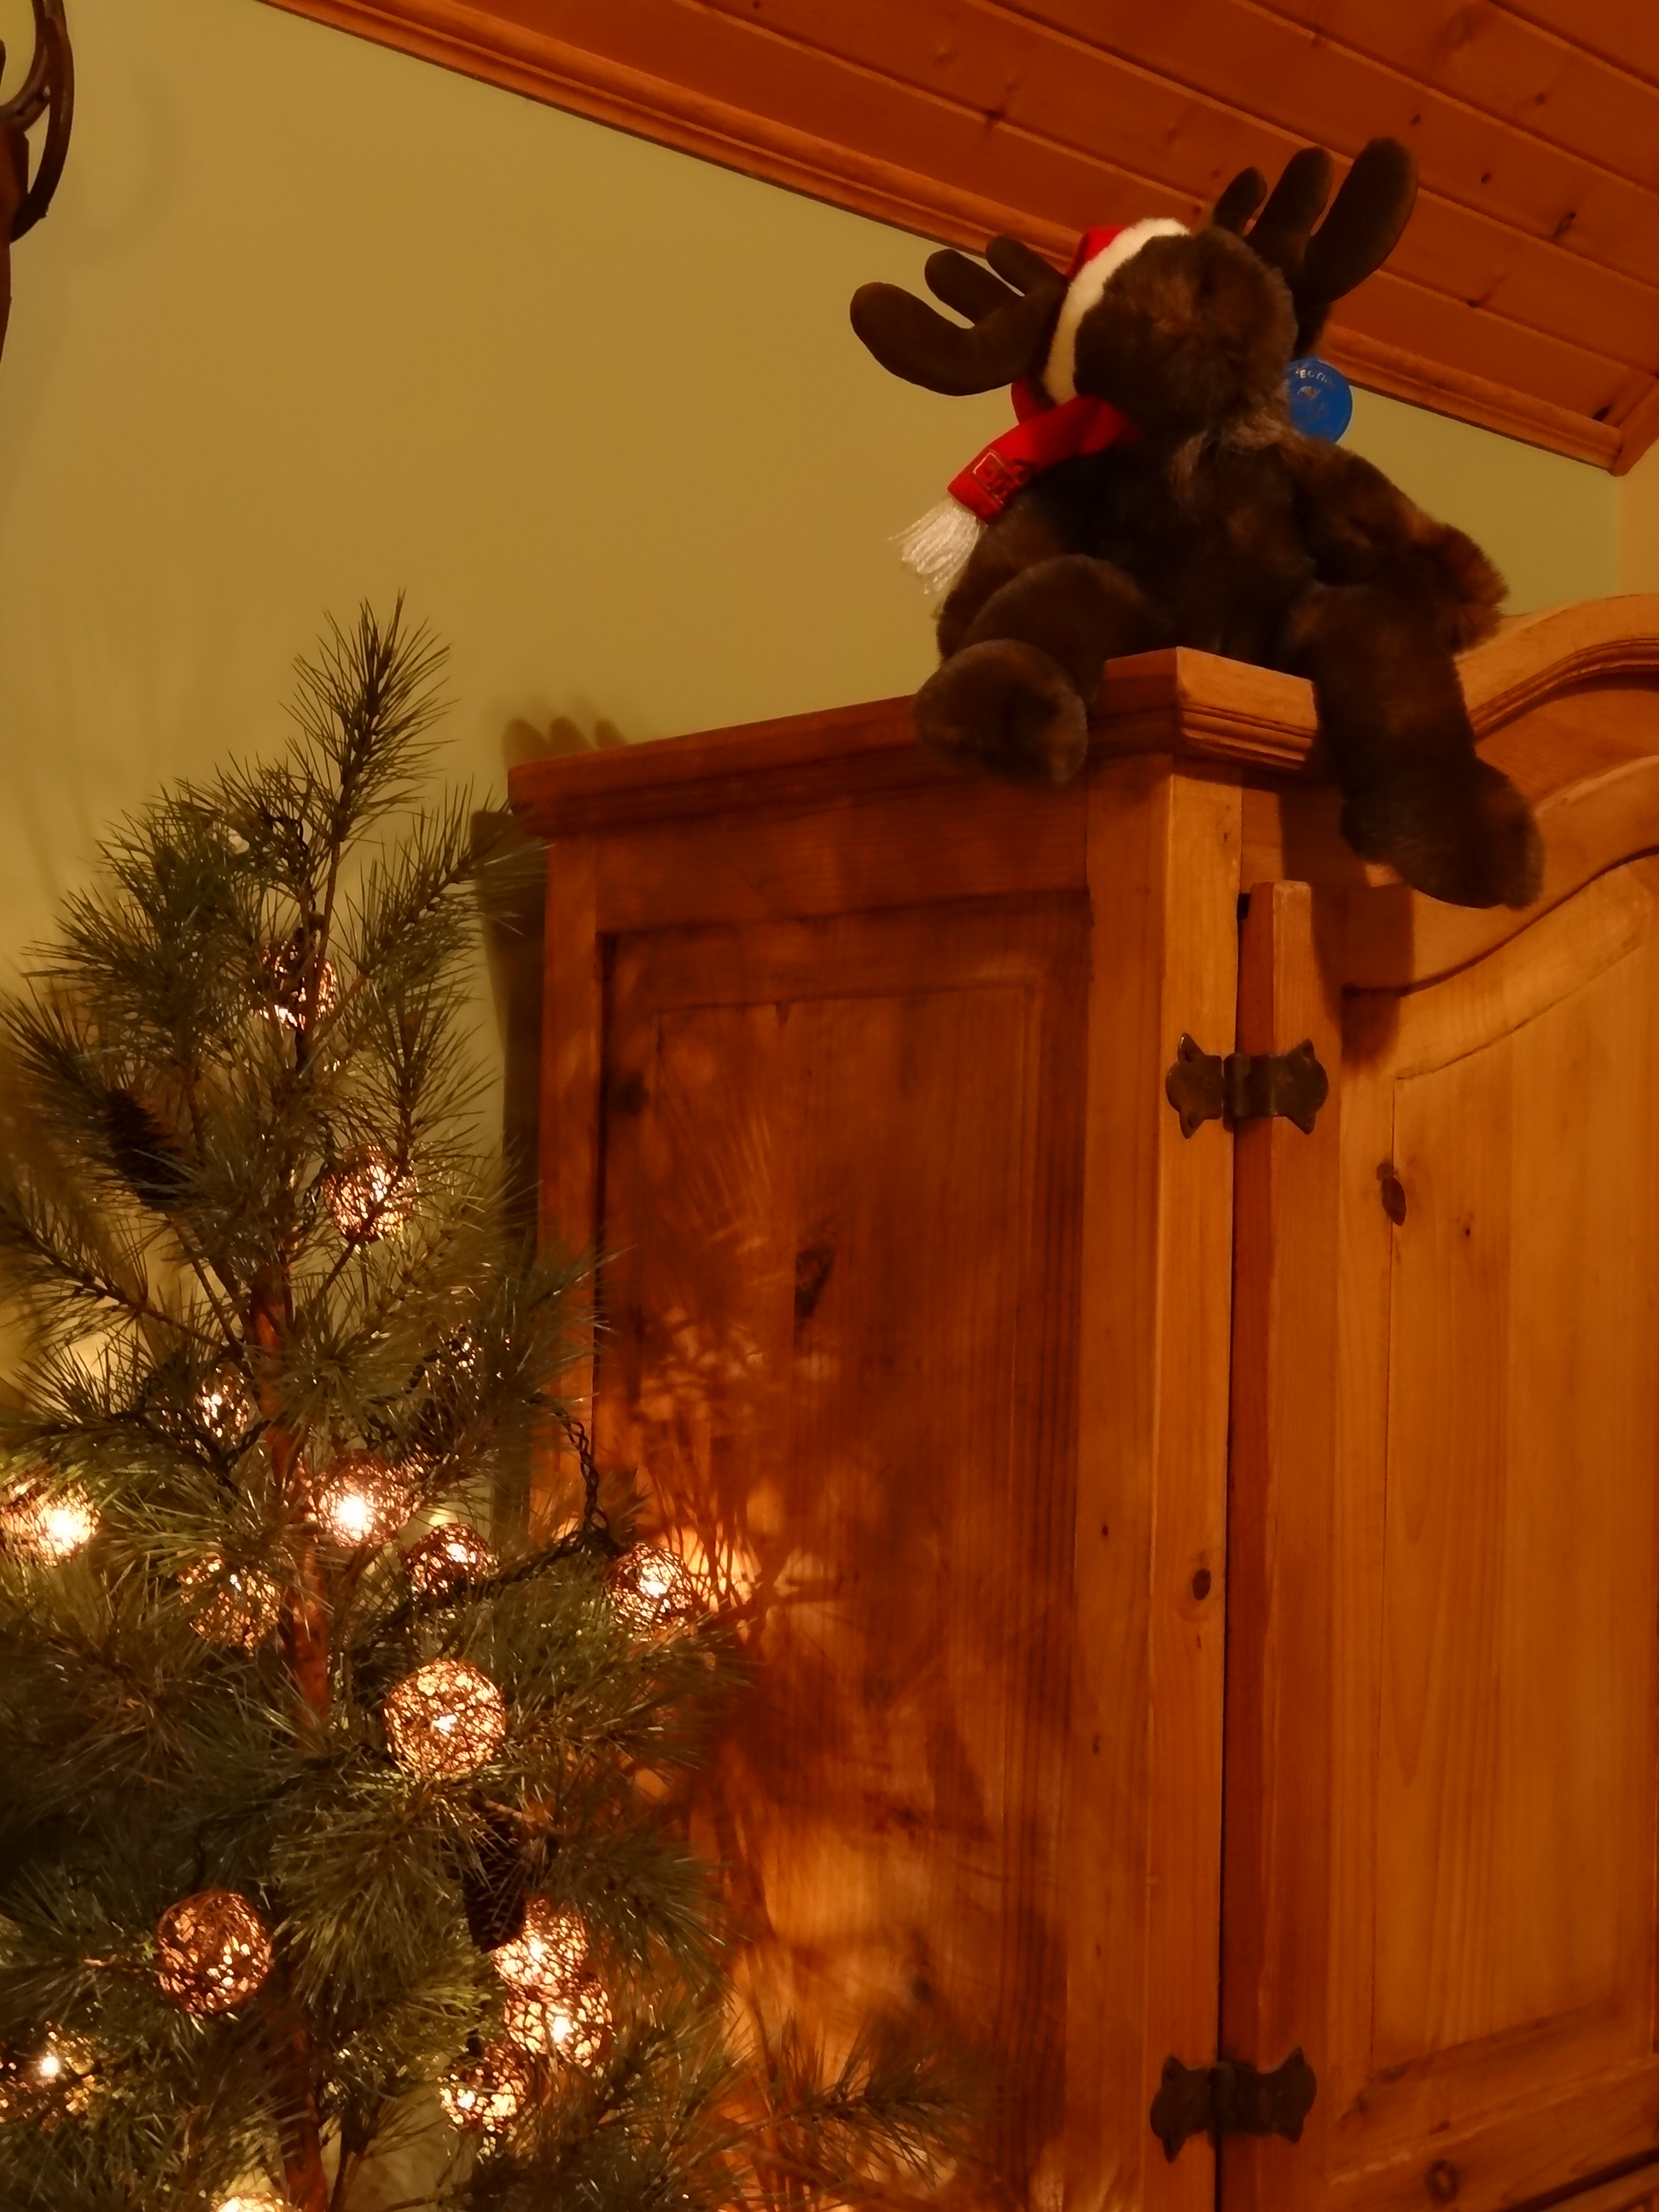
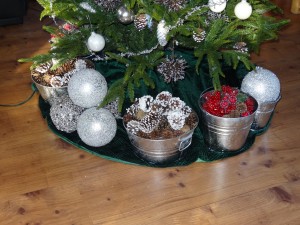
I’ve used galvanized pails as planters, decorative items, pendant lights, and magazine holders. Some of you may remember my Christmas tree from a prior post.

Galvanized pails and pine cones


This pendant in our basement began its life as a $4.00 paint bucket at Home Depot.

Seriously.


Pendant

You can organize toys with them, items in the laundry room…the ideas for these just keep on coming! 🙂

5. Plastic Bags and Egg Cartons

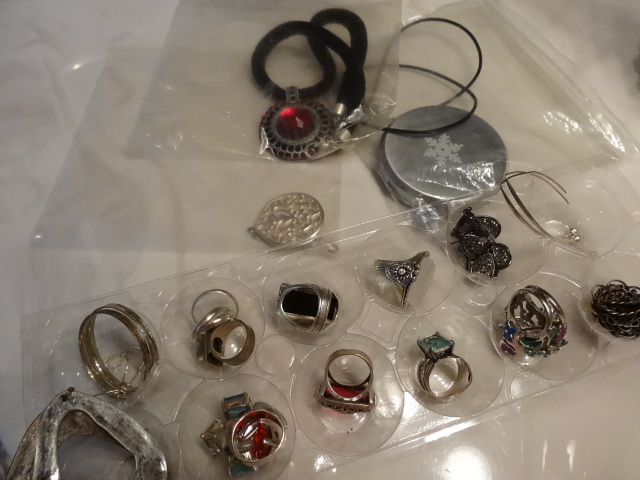
I’ve mentioned before about how much I love egg cartons.

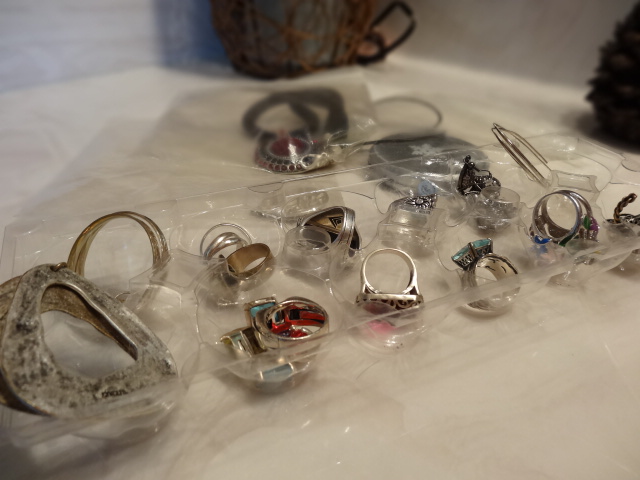
They make wonderful holders for jewelry such as earrings and rings.

They don’t get tangled up, and each one has it’s own separate little space.

2014-07-06 10.43.12


I also use them to hold nail polish. They would be great holding small items in your desk such as thumb tacks, rubber bands, etc. Anything small that needs to be contained. Sewing supplies, maybe? Small, hard-to-find items that you end up digging and digging for wastes a ton of time. And I’m not into that.

I want to free up as much of my time as possible for fun, meaningful things in life that bring me joy.

2014-07-06 10.43.27


Which is why I put all my necklaces in plastic bags.

How many times have you opened your jewelry box to get a necklace only to find it tangled? Or tangled with something else? So, you try for a few minutes until you realize that you are getting frustrated and short on time and now, thanks to this, crabby? Not a fun way to start the day.

I rest my case. 😉

2014-07-06 10.43.37


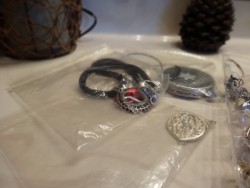
I prefer the clear plastic pint bags for jewelry, that way you can see it better.

If you have a matched set of earrings and a necklace that you always wear together, you might consider placing the earrings in a snack bag inside the bag with the necklace.

It’s also MUCH easier to travel. I just grab the bags and put them in my suitcase.

Speaking of travel…I have a neat bag with my initial on it for jewelry. It’s a really cute bag and I love it; it’s just not compartmentalized. So, I put all my earrings separately into snack bags, and place them inside the jewelry bag. Easy-peasy!

Happy re-purposing, my friends! 🙂
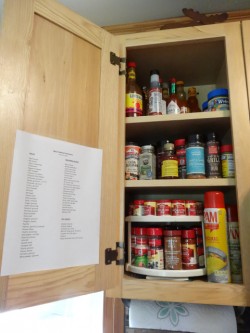
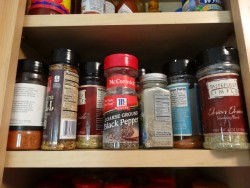
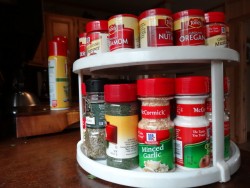
5 Easy Tips to Organize Your Photos

We’ve finally arrived at that not-quite-spring-not-quite-winter lull that makes me restless, itching for change, and tired of the status quo. For me, this translates into the urge to organize. In the last 3 weeks, I’ve reorganized my make-up drawer, my pantry, my pots and pans, my socks, the dog food, and a myriad of other little things that escape me at the moment. While they are all very satisfying to me, I’m certain you wouldn’t be the least bit interested. 😀 But I thought you might be interested in this. 

Digital photos can be the skeleton in everyone’s organizational closet.

How many of you have 482 pictures on your SD card that you’ve never bothered to download because now it’s too overwhelming? Or have wonderful pictures on your phone of your kids, your last vacation, etc? How do you get them off your phone? What if you lost your phone? What if your hard drive crashed?

Spring means proms, dances, graduations, reunions, vacations…more and more pictures. Do you have all your pictures made into prints? What if (God forbid) your house burned?

Pictures are the priceless treasures that become the biggest loss. Material things can be replaced. Pictures, and memories, can’t. So, I’m here to help you bring order to all that digital chaos and give you Inner Peace.

At least for your digital disorder. 😉

1. Find an on-line storage system.

Some people use Instagram, and I’m sure there are others. I use Dropbox because I have other files I need to back up. I love Dropbox! (www.dropbox.com).

You receive 2G free when you sign up. You can earn free space by signing your friends up, or for $99 per year, you can purchase additional storage. And still earn free space!

I am a half-wit, and I know this, so I have to plan accordingly. I can never remember to back up files. What if I back them up, then lose whatever I backed them up on? What if my house burns down? What if I forget to back up the files in the first place? What if I’m out of state and need a file and don’t have my laptop OR my back up system?

See how my Inner Hysteria works?

(Did I mention I love Dropbox?)

I store ALL my files on the cloud. I can access my files on ANY computer. If I lose my computer, all my pictures and other files can be accessed by any other computer or my phone.

2014-03-20 12.53.52


Here’s what my Dropbox file looks like. It’s no more difficult than setting up folders in your computer’s Documents.

Dropbox is simple to use, simple to set up files, and also has an option to allow you to share pictures publicly, which is handy. For instance, when my hard drive had to be replaced last fall, the only file I lost was the ZIP file with my niece’s wedding photos, which I hadn’t unzipped and moved to Dropbox. I emailed her, and she resent them..in Dropbox. 🙂

A caveat: if you use Dropbox on your phone, make sure your phone is password-protected so your files aren’t compromised if you lose your phone. Also, never ever allow the browser to save your password if you’re logging in from a public computer.

2. DropSnap.

If you are like me, and take a lot of pictures from your phone but don’t like worrying about transferring them (or figuring out how to do it!),  you will love DropSnap. It’s an app with a one-time fee (I think it’s about $4). Every time I take a photo with my phone,  it automatically uploads to my Camera Upload file in Dropbox. (Yes! Really!)

The downside is for this to work you have to use Dropbox. That doesn’t mean there isn’t another app out there that could do the same thing with what you’re using. It just means I don’t know about it.

My poor little pea-brain (vs. pee brain, which sometimes happens ha ha) can only hold so much stuff and everything else just sort of gets squeezed out. Sort of like the pee…okay, never mind. 😀

3. Organize Your Pictures in Folders. 

I organize all my digital pictures in folders by year.

2014-03-17 09.30.52

See?  By the way, I took this picture with my phone – sorry about the reflection of the window…ooops. The picture then automatically uploaded to my Camera Upload folder, and I used my laptop to place it into this post. Groovy, eh?)

Also, it’s hard to take a picture of a computer screen up close. I think it’s something to do with the pixels. Or at least it was back in the day when I worked in TV. But I digress.

Apparently, 2006 was the year I received a digital camera for Christmas. Which I later lost at the Truman Homecoming when it fell out of my coat pocket when I was riding with my husband in a friend’s Mule and we were careening around corners.

Squirrel!

Sorry. 😀

I’ve not had any sugar, I promise. 😉

I then make sub-folders in each year of various events, vacations, etc.

2014-03-17 09.31.14


This is my 2014 folder. More folders will come as the year passes, but I’ve grouped them together to easily find what I’m looking for.

In my Florida folder, I have more folders broken down into locations or subject, such as sunsets or our visit to the Dry Tortugas.

You can get as crazy organizing as you want!

The purpose of this, however,  is to relieve stress and make it easier to find what you’re looking for. I don’t recommend getting ‘analysis paralysis’ and stressing over too many folders. Just categorize them generally.

4. Do a Little At A Time.

If you’re the person who has 482 pictures on your camera…or 3,487 pictures on your hard drive…or 12 SD cards full of pictures…this is going to seem like an overwhelming task.

I get that. I’ve been there.

Whatever you’re planning to do with those pictures, you can still do…it will just make it easier to find them, and easier for you to enjoy them more if they’re more organized. I can whip out my phone and show someone any of my pictures at any time – whether they want to see them or not! BWAH HA HA HA

I’ve been at lunch with former clients who have been talking about doing an update to a room in their house.  I can whip out my phone, pull up the pictures of their room, and boom! We’re right on the same page. (Usually.)

I will NOT be responsible for your friends avoiding you due to picture-fatigue. This is a VERY powerful tool, so please use it responsibly. 😉

Just start wherever you are! The next time you upload pictures, try organizing them. Do NOT get carried away weeding out the crappy ones! Just put them ALL in a folder for now.

The next time you’re stuck on the phone on hold, or listening to Great Aunt Mabel who likes to talk, or your husband is in charge of the TV remote and you hate what he’s watching, weed through them. You can delete the crummy ones, or go back through some of  your older pictures and organize a few more.

I wouldn’t accomplish anything if I didn’t do it a little at a time.  One baby-step at a time will eventually take you down the whole road.

“Chunking it” is the term my friend Michelle uses. Breaking up any overwhelming job into one ‘chunk’ at a time will eventually get it done. 🙂

5. Use Photo Boxes.

Picture box

I used to have about 25 photo albums. These albums took up boxes and totes, and I moved across country with them twice. They were heavy, and guess what? Rarely did I ever go back and look at them.

A few years ago, tired of all the space these albums hogged, I worked one album at a time, removing all the pictures and making files (by year/event/location/subject) in photo boxes. I think I even used shoe boxes!

Now, every paper photo I have ever taken fits into boxes in two totes in the basement. The totes keep them mouse proof and dry if the basement ever floods.

If you have kids, you can sort them into boxes per kid (what a nice keepsake!)

They take up less space, they are easier to move, and all I have to do is pull out a box, search for the year or subject, and pull out the pictures!

My next project is going to be sorting through and digitizing some of my old family pictures so I will have them forever. (That’s probably a project for next winter or the ridiculously hot summer months.)

Family photos

Recently, I took my wedding negatives in to have them digitized, after keeping them in a safety deposit box for years. I can promise you I enjoy them much more in their current format than I ever did in the album!

And if there’s a better way that works for you…fabulous! The whole point is to enjoy all those pictures you’ve taken rather than have them weigh you down.

Happy Organizing!

5 Easy Christmas Decoration Ideas

Oh Christmas Tree


Happy Friday the 13th! And if you’re reading this in the Midwest today, you know the weather is crummy. With a capital C! This is one of those weekends where most of us should probably just hunker down and lay low until the roads are cleared.

That’s probably why I had the sudden urge to go shopping. I had nothing I needed, mind you. I just wanted to go. Probably it was because I knew I shouldn’t. Or couldn’t. ha ha

Anyway, this post is for those of you who have been stressed to the gills and are feeling guilty because not only have you not done much decorating, you aren’t sure you want to bother.

Let me just say, I feel your pain.

I love having my house decorated for Christmas. I just hate doing it. And there have been Christmases past where I haven’t, usually because we were remodeling and I couldn’t face packing and unpacking more boxes!

Here’s some quick little tips to help your house look festive without doing a whole lot, and using what you have. Honestly, the smartest thing I EVER did was to bless someone else with my gorgeous but huge, heavy, and unlit tree. If you’re tree shopping, I have one word for you: PRE-LIT. I also went for a tall, but slim tree last year. And I’ve never looked back.

1. Choose a color or a theme.

New coffee table


Meet my new coffee table. SIGH. I’m totally in love with this table. This was my birthday and Christmas present from Jimmy, which just came a couple of weeks ago. He even liked it when it came and he realized it was my gift.

BAH HA HA HA HA.

The best part about it is no more lost bones or hooves underneath! But I digress.

If you’re having trouble deciding WHICH of your decorations you want to get out, don’t feel like  you need to get them all. Simplify this year.

Pick just the ornaments that are your favorite color. Or go with just your favorite ornaments. Or just the ornaments that the kids have made. Or use patio lights that already have a decorative exterior. Or simply smother the tree in lots of pretty lights and some tinsel and call it good. At night, it will be breathtaking!

Several years ago, I blessed my nieces with my “collectible” Hallmark ornament collection, all still in the little boxes, which were the biggest pain come the holidays. I couldn’t bear the thought of opening all those little boxes one more time. I’d collected them for years and was so completely over them.

My ornaments are now primarily white, silver, clear, or brown (twiggy spheres and pine cones) with “ice crystals.” And a few antlers thrown in, because we like the rustic look.

2. Lights maketh a winter wonderland. 

White lights

If you’ve ever been to the Ethel M. Chocolate Factory in Las Vegas, they have a huge cactus garden that’s drenched in lights during the winter. No ornaments. No big generator-powered yard displays. Just lots and lots of lights. It’s quiet, peaceful, and absolutely magical. And breathtaking. And not an ornament one. (Or at least there didn’t used to be.) It was always one of my favorite Christmas stops when I lived there.

You can do the same thing to your house.

If you love red lights, use all red. Blue would also be gorgeous! Lots of vibrant colors? Awesome!

Let your kids help, then turn out all the lights in the house and have dinner or even just hot chocolate with only the Christmas lights on. Wowww… 🙂

We happen to prefer white lights. There’s something clean and simple and always elegant about white lights. This year, we did manage to decorate the outside of our house with them. (We’ve not accomplished that some years.) And, no one was injured in the process, which is always a plus. 😉

More white lights

We have them around our big windows on the inside, and trailing over in front of our fireplace. Doesn’t that look nice? You almost don’t notice that I forgot to light the candles!

I have them above my kitchen cabinets year-round. It’s a terrific way to add a little bit of ‘mood lighting.’ During the winter, I throw some garland up there and leave it to look festive. I usually leave the garland up all winter until about March, as it is just pine garland with pine cones and some snow.

Garland and white lights

Do you have stairs? Wrap them around your banister! Drape them through your house plants, whether real or faux. Do you have a ficus tree? Stick some in there!  Your house will look like a winter wonderland in no time!

3. Less is more.

Let it snowDon’t feel like you need to put everything you own out. Often, a little sprinkled around looks better anyway than if your house looked like Christmas threw up in it.

During the Great Basement Clean Out, I emptied about 10…yes, 10..totes full of decorations I’d accumulated over the years. I could have decorated 3 houses! With so much stuff, it’s no wonder decorating was an overwhelming task. I kept all my favorite things, and still didn’t put everything out. I didn’t feel like I needed to.

Less is more


I placed some of my favorite things around the house, like this little snowman guy who looks perfect sitting on this table. Nearly everything in my house I have decorated you see in these pictures.

Put out just a few of your favorite things, or let your kids pick out a favorite. Everyone will think your house is tastefully underdone! And simple. And elegant.

4. Be quirky!

Quirky!Don’t be afraid to put things in unexpected places.

This stuffed moose is one of my favorites, but for the life of me I couldn’t think of a spot for him. So I sat him on top of the armoire, where he can nonchalantly survey the landscape. That pine tree, by the way, is faux. And it has patio lights in it.

It was downstairs in the bar, but got squeezed out by a neon light. The tree looks great here, and really adds something to the room. I will say he’s suffered a bit from all my repurposing and moving around, so I think here he’s going to have to stay.

Even Morty the Moose gets gussied up! I put a Santa hat on him every year at Christmas. Unfortunately, the lighting wasn’t good enough for me to get a good shot. I’ve thought about putting lights on his antlers, but somehow, Morty is too dignified for that. 😀

5. Make something you already have festive.

Galvanized pails and pine conesWe don’t do much in the way of a gift exchange, so the bottom of our tree always looks bare. I decided to dress it up a little this year, and picked up several galvanized pails of varying sizes at Tractor Supply. (I love Tractor Supply!)

I already had the pine cones and over-sized ornaments, so it was a matter of placing them around the bottom of the tree. The red you see is actually a sphere with pine cones, plums, ice crystals, and some other stuff.

You know all those ornaments you aren’t putting on the tree? Fill a beautiful crystal bowl or candle holder with them and use it as a centerpiece. Or fill some pretty baskets with them and place several of them under the tree. Or collect some pine cones and do the same. I actually had collected these you see in the picture during my crafting days, painted and glittered them.

All these are easy Christmas decoration ideas that anyone can do, and they aren’t time consuming. With this approach, all you need is a few minutes here and there. Don’t be afraid to try something a little bit different; I rarely do the same thing twice, mostly because I can’t remember from year to year. You might be surprised at how something fresh (and easy!) can be a holiday pick-me-up. 🙂 Good luck!

Make a Breakfast Casserole This Weekend!

Amish Breakfast Casserole

Amish Breakfast Casserole

Every once in a while I like to change things up and make a breakfast casserole for Sunday morning. Because I’m going out of town on a Girl Power trip this week, I made this and froze the leftovers. Jimmy can feel the love from me, while I’m enjoying myself on the beach, with the ultimate in comfort food made just for him.

If we’re having a potluck at work, I’ll sometimes take this for breakfast, knowing we’ll have tons of food for lunch. It’s versatile,  you can use bacon or sausage, and you can make much of it ahead of time. It’s all cheesy goodness and everything else that’s yummy about breakfast. Plus it’s simple to make.

If I’m making it the day before, I’ll cook the sausage and mix everything else together but the eggs.

Amish Breakfast Casserole        

  • 1 pound sliced bacon, diced (or 1 lb. cooked sausage)
  • 1 medium sweet onion, chopped
  • 6 eggs, lightly beaten
  • 4 cups frozen shredded hash brown potatoes, thawed
  • 2 cups (8 ounces) shredded cheddar cheese
  • 1-1/2 cups (12 ounces) 2% small curd cottage cheese
  • 1-1/4 cups shredded Swiss cheese

Directions

  • In a large skillet, cook bacon (or sausage) and onion until bacon is crisp; drain. In a large bowl, combine the remaining ingredients; stir in bacon mixture. Transfer to a greased 13-in. x 9-in. baking dish.
  •    Bake, uncovered, at 350° for 35-40 minutes or until a knife inserted near the center comes out clean. Let stand for 10 minutes before cutting. Yield: 12 servings.

The Best Preparedness Flashlight Ever!

FlashlightSo I have a funny dog story that I’m dying to post. However, the storm we had Thursday afternoon interrupted those plans. After having the daylights scared out of me thanks to the 80 mph winds and cleanup afterwards, I was worthless the rest of the day! So thanks to the storm, you’re getting this one today instead.

I learned a good lesson after the storm we had last week: that these things can come up suddenly and with very little warning, and even if you think you’re prepared, you might not be. Our storm was in the middle of the afternoon and we never lost power, but much of Kirksville did. Some locations went hours without power, so having multiple flashlights that work can be critically important.

How many times do you go fumbling in the dark looking for a flashlight? Are the batteries fresh? Do you remember where you left it? Do you have one at your bedside? What if you’re in the bathroom and the power goes off? What if you have company and they need to get up in the night?

These cool little flashlights can do it all!

These little gems can be a flashlight, a nightlight, or a lantern. I honestly liked these so much, I bought 6 of them. Yes, really! I think it’s one of the best purchases I ever made. They came 2 to a pack for less than $30 (I think more like $20) at Sam’s Club. I have them in our kitchen, bedroom, our bathrooms, and our guest room, all places that can be very dark, especially at night! While I keep the ones in our bedroom shut off, the ones in the kitchen, guest room and bathrooms automatically come on when it’s dark, just like a night light.

You always know where they are. They are always charged. And you never have to fumble for one again. It’s the perfect multi-tasking tool!

  • Page 1 of 2
  • 1
  • 2
  • >